Having a sump pump system installed in your home is an excellent way to protect your basement or crawlspace from water damage. In simple terms, a sump pump is a device that pumps water out of your sump pump pit to prevent flooding. However, it’s essential to make sure that the system is working correctly, especially before the rainy season. We’re here to guide you through everything you need to know about how to test a sump pump.
Are you ready to get started? Let’s discuss the best way to test your sump pump!
Why It’s Important to Test Your Sump Pump
Before we dive into how to test a sump pump, let us first understand why it’s essential to test it regularly.
The Best Way to Test Your Sump Pump
If you wish to ensure that your sump pump keeps running when you need it most, it’s always best to reach out to an expert. For example, at AP Plumbing, we can provide you with professional sump pump maintenance, during which we will perform a thorough inspection and test the unit for proper operation. However, there are also ways that you can test your sump pump yourself.
To do this, you’ll require some basic tools. You’ll need a 5-gallon bucket, electrical cords, and some water. Some backup systems have their float cord and pump cords, so it’s essential to read your manual before testing.
Now that you know the tools you need, let’s dive into how to test a sump pump step-by-step.
Step 1: Locate the Sump Pump Pit
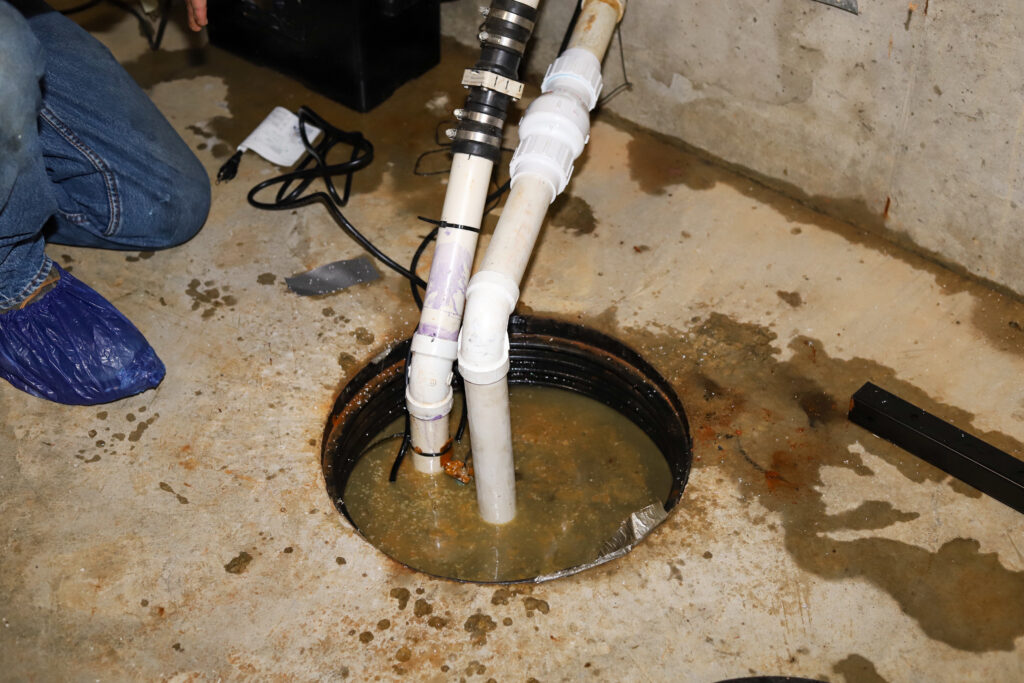
When discussing the best way to test your sump pump, it’s important to start at the very beginning. The first step in testing your sump pump is to locate the sump pump pit. This pit is usually located in the basement or crawlspace of your home.
Step 2: Lift the Float
Lift the float by reaching into the sump pump pit and lifting it. The float is an essential component of a sump pump system as it triggers the pump to turn on. However, if your sump pump doesn’t have a float, refer to your manufacturer’s manual for instructions.
Step 3: Pour Water Slowly
Next, pour water into the sump pump pit from the 5-gallon bucket. Gently pour water to prevent splashing, and fill the pit until the water level reaches the top. Observe whether the pump turns on and begins to pump water out. If the pump doesn’t turn on, check the power source and ensure it’s turned on and the plug is secure.
Step 4: Unplug the Pump
If the pump turns on and evacuates water, unplug the pump. This action simulates an electrical outage, and it’s vital to know whether your sump pump has a backup system or not. Observe the water level to see how long it takes to fill up. If the water level rises quickly, it could indicate a problem with the backup system.
Step 5: Repeat the Process
Repeat steps three and four above to ensure that your sump pump is functioning correctly. Remember, the goal is to ensure that your pump can handle the water and works correctly. A thorough test is necessary to guarantee effective protection against water damage.
Most importantly, please remember to plug your sump pump back in when testing is completed to ensure proper operation.
Congratulations — you now know how to test a sump pump! Please remember to plug your sump pump back in when the testing is completed to ensure proper operation of your system!
Call the Professionals at AP Plumbing
If you’re having trouble testing your sump pump or think that your sump pump system isn’t working correctly, call the professionals at AP Plumbing. Our experienced plumbers can help you diagnose any problems and provide you with the best solution possible. Protecting your home from water damage is crucial, and regular sump pump maintenance is a great way to do so.
Although it’s helpful to know the best way to test your sump pump, sometimes it’s a good idea to turn to a professional for help. Fortunately, that’s where we can be of assistance. Whether you need an emergency sump pump service or a routine check-up, don’t hesitate to give us a call. Contact us today to schedule your appointment in Rochester or Syracuse, NY!


